Assignment 1 | THE BLISTER
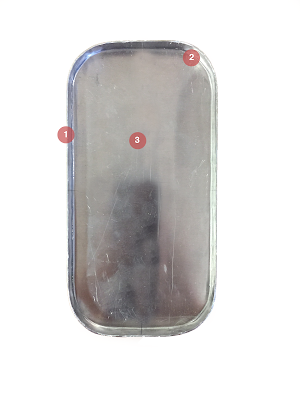
The last task of assignment one enabled us to learn how to fabricate an aluminium blister.
Using a wooden template, a sheet of aluminium was positioned in place with screws and a set of clamps to ensure the sheet was as still as possible. Once all of these materials were in place, the manufacturing process could begin.
Heeding advice from a fellow classmate, I slowly created an indentation in the aluminium using soft and gentle blows in order to avoid any cracking. I was able to best undertake this using a wooden hammer, as this absorbed more energy from the blows and had a softer surface.
Once I found the depth of my blister to be satisfactory, I began to work on the circumference of the shape. Using a wooden shaft to allow me to access the narrow and awkward spaces, I slowly worked my way around the shape striking with gentle blows to create more depth along the rim. After removing the wooden template, I began softening out the wrinkles within the aluminium using a dolly and hammer.
Overall, I enjoyed this task. My favourite part was removing the aluminium from the template and seeing the awesome shape sharply protruding from a flat piece of metal - I don't know why, but I found this satisfying!


Comments
Post a Comment